Ubuntu笔记
本文档仅用于记录常用的一些操作.
1. Ubuntu 系统使用
1.1 用户篇
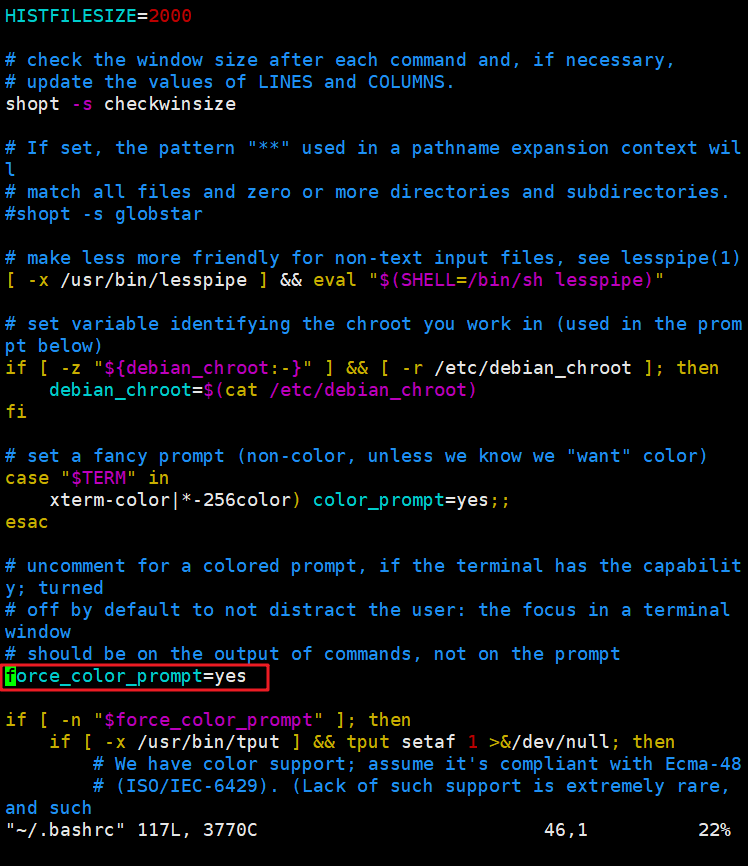
1.1.1 用户名高亮
取消 .bashrc文件中force_color_prompt=yes 的注释

1.1.3 用户管理
1) 添加用户
常用的指令
| 指令 | 解释 |
|---|---|
-s /bin/bash |
Set /bin/bash as login shell of the new account |
-d /home/username/ |
Set /home/username/ as home directory of the new Ubuntu account |
-m |
Create the user’s home directory |
-G sudo |
Make sure vivek user can sudo i.e. give admin access to the new account |
2) 删除用户
userdel username
3) 管理用户
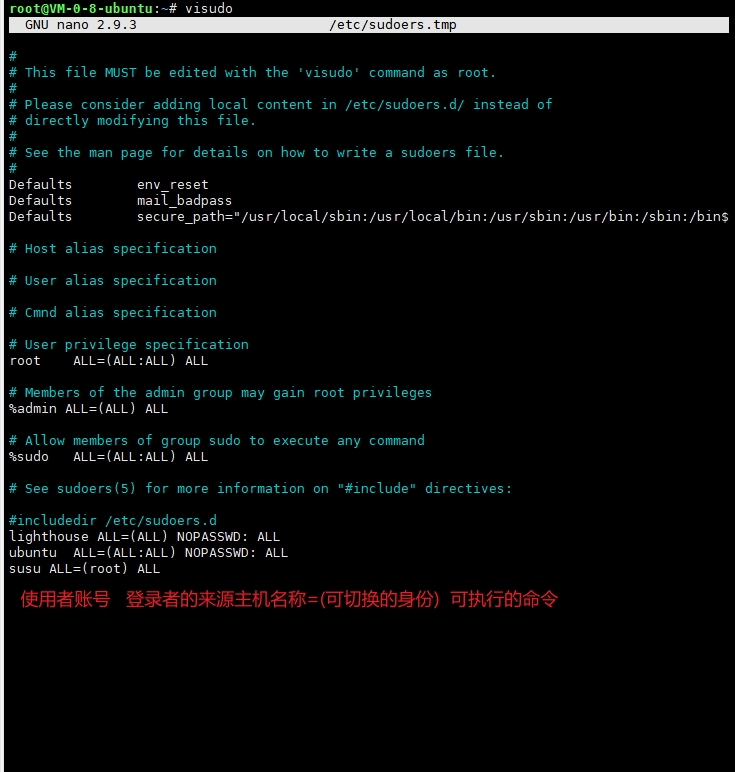
- 为普通用户赋予sudo的所有权限
- 查看用户
4) root 初始管理
- 修改root密码
sudo passwd root

- 设置允许root用户登录
sudo vi /etc/ssh/sshd_config

# 修改
PermitRootLogin yes

- 重启ssh服务
sudo service ssh restart
5) 切换用户的异常

【解决方案】

1.2 系统篇
1.2.1 修改主机名
hostnamectl set-hostname xxx
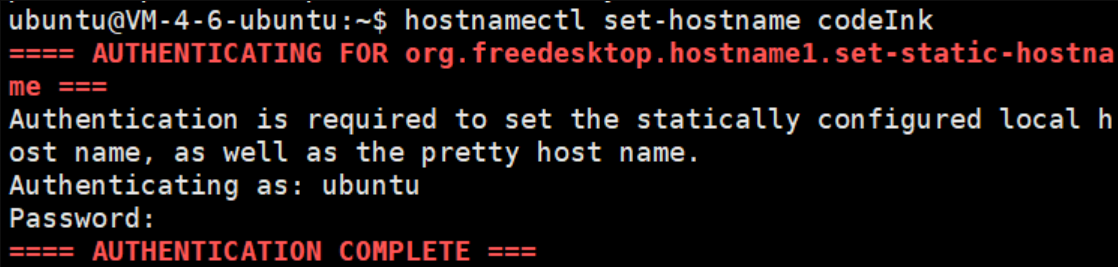
xxx 是 修改后的主机名
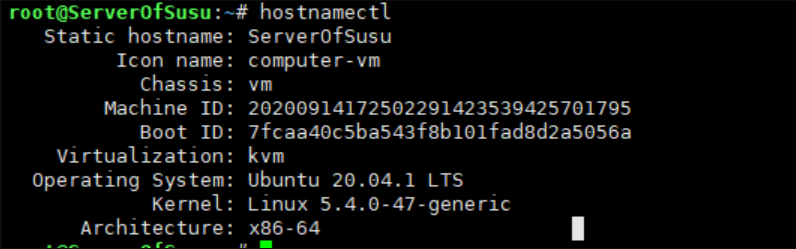
- hostnamectl : 可用来显示目前的主机名称与相关信息.
- hostname == cat /etc/hostname
1.2.2 查看防火墙
换源:
deb http://mirrors.aliyun.com/ubuntu/ focal main restricted universe multiverse
deb-src http://mirrors.aliyun.com/ubuntu/ focal main restricted universe multiverse

deb http://mirrors.aliyun.com/ubuntu/ focal-security main restricted universe multiverse
deb-src http://mirrors.aliyun.com/ubuntu/ focal-security main restricted universe multiverse

deb http://mirrors.aliyun.com/ubuntu/ focal-updates main restricted universe multiverse
deb-src http://mirrors.aliyun.com/ubuntu/ focal-updates main restricted universe multiverse

deb http://mirrors.aliyun.com/ubuntu/ focal-proposed main restricted universe multiverse
deb-src http://mirrors.aliyun.com/ubuntu/ focal-proposed main restricted universe multiverse

deb http://mirrors.aliyun.com/ubuntu/ focal-backports main restricted universe multiverse
deb-src http://mirrors.aliyun.com/ubuntu/ focal-backports main restricted universe multiverse
2. 安装常用工具
2.1 安装python3.7
-
Start by updating the packages list and installing the prerequisites:
sudo apt updatesudo apt install software-properties-common -
Next, add the deadsnakes PPA to your sources list:
sudo add-apt-repository ppa:deadsnakes/ppaWhen prompted press
Enterto continue:Press [ENTER] to continue or Ctrl-c to cancel adding it. -
Once the repository is enabled, install Python 3.7 with:
sudo apt install python3.7 -
At this point, Python 3.7 is installed on your Ubuntu system and ready to be used. You can verify it by typing:
python3.7 --versionPython 3.7.3
2.2 安装TensorFlow
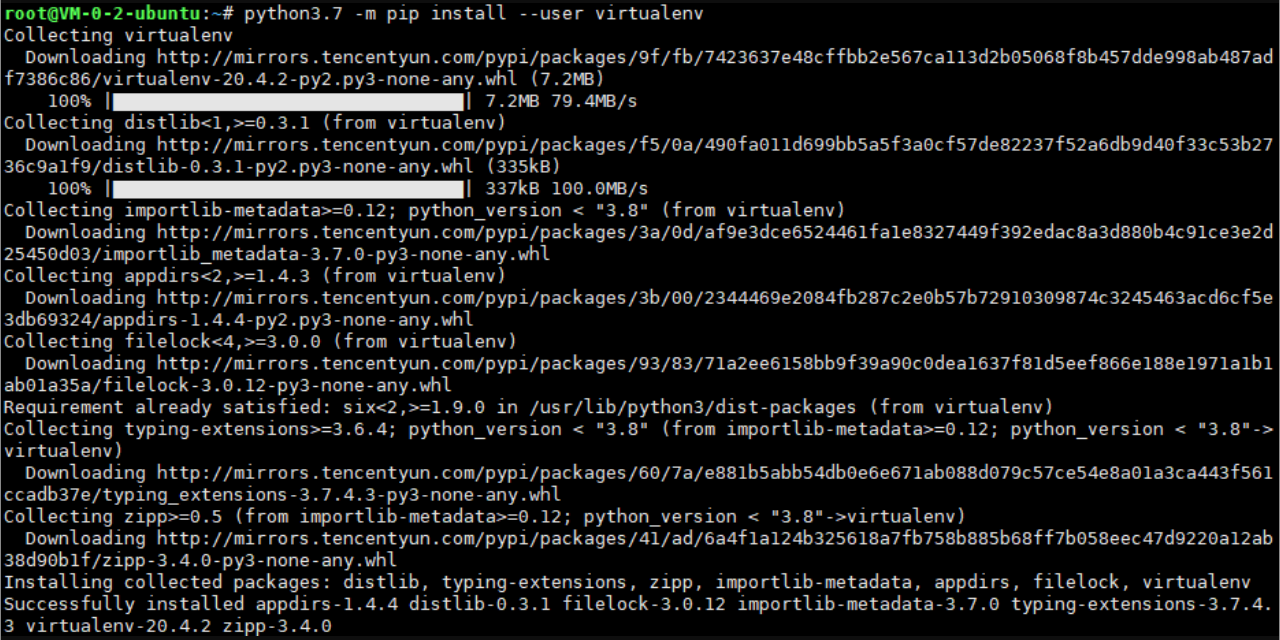
via virtualenv
python3.7 -m pip install --user virtualenv
按照如下步骤来使用 virtualenv 安装 TensorFlow:
-
选择下面的一条命令来安装 pip 和 Virtualenv:
 $ sudo apt-get install python-pip python-dev python-virtualenv # for Python 2.7
 $ sudo apt-get install python3-pip python3-dev python-virtualenv # for Python 3.n

-
挑选其中的一条命令来创建一个 Virtualenv 的虚拟环境:
 $ virtualenv --system-site-packages targetDirectory # for Python 2.7
 $ virtualenv --system-site-packages -p python3 tensorflow # for Python 3.n
其中
*targetDirectory*指明了 Virtualenv 树中根部位置。我们的命令中假设了*targetDirectory*是~/tensorflow,但你也可以指定任意目录。

-
通过以下任意一条命令激活 Virtualenv 的虚拟环境:
 $ source ~/tensorflow/bin/activate # bash, sh, ksh, or zsh
 $ source ~/tensorflow/bin/activate.csh  # csh or tcsh
 $ . ~/tensorflow/bin/activate.fish  # fish
第一条
source命令会将你的前缀变为(tensorflow)$

-
确保安装了 pip 8.1 或更高版本:
(tensorflow)$ easy_install -U pip -
运行下列其中的一条命令来在激活的 Virtualenv 环境中安装 TensorFlow:
 (tensorflow)$ pip install --upgrade tensorflow      # for Python 2.7
 (tensorflow)$ pip3 install --upgrade tensorflow     # for Python 3.n
 (tensorflow)$ pip install --upgrade tensorflow-gpu  # for Python 2.7 and GPU
 (tensorflow)$ pip3 install --upgrade tensorflow-gpu # for Python 3.n and GPU
如果前面几步成功了,则可以跳过步骤 6,否则需要继续执行步骤 6。

-
(可选)如果步骤 5 失败了(通常是由于你运行了一个低于 8.1 的 pip 版本),通过以下命令来在激活的 Virtualenv 环境中安装 TensorFlow:
 (tensorflow)$ pip install --upgrade tfBinaryURL   # Python 2.7
 (tensorflow)$ pip3 install --upgrade tfBinaryURL  # Python 3.n
其中
*tfBinaryURL*指明了 TensorFlow 的 Python 包的 URL 路径。*tfBinaryURL*的值取决于操作系统,Python 版本和 GPU 支持。在这里找到时候你的系统的*tfBinaryURL*值。例如,如果你要在 Linux 中安装 Python 3.4 和仅支持 CPU 环境的 TensorFlow,在激活的 virtualenv 环境中运行如下命令即可:(tensorflow)$ pip3 install --upgrade \ https://storage.googleapis.com/tensorflow/linux/cpu/tensorflow-1.8.0-cp34-cp34m-linux_x86_64.whl
如果你遇见了安装问题,请见:常见安装问题。

下一步
在安装了 TensorFlow 之后,需要 验证你的安装。
请注意你必须在每次运行 TensorFlow 之前都要激活你的 Virtualenv 环境。如果 Virtualenv 环境当前并没有激活,运行以下其中一条命令:
$ source ~/tensorflow/bin/activate      # bash, sh, ksh, or zsh
$ source ~/tensorflow/bin/activate.csh  # csh or tcsh
当 Virtualenv 环境激活后,你可以使用 shell 来运行相关程序。出现如下提示时,代表着那你的虚拟环境已经激活了:
(tensorflow)$
当你使用完 TensorFlow 之后,你可以通过 deactivate 命令来休眠该环境:
(tensorflow)$ deactivate
前缀提示会变回原来默认的样式(由 PS1 环境变量定义)。
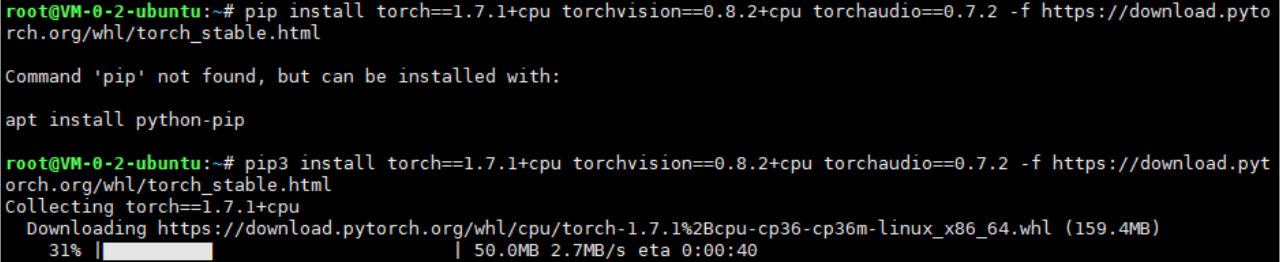
2.3 Pytorch
https://pytorch.org/get-started/locally/
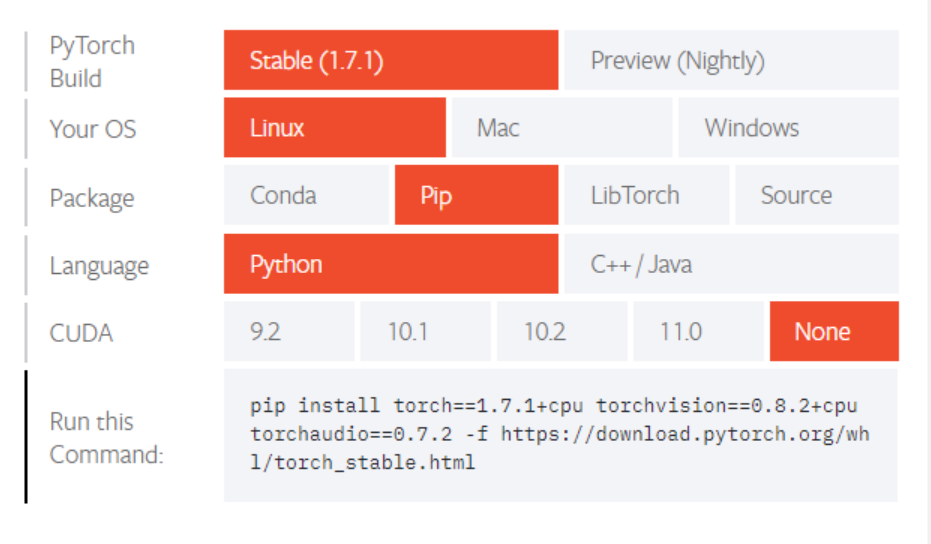
pip3 install torch==1.7.1+cpu torchvision==0.8.2+cpu torchaudio==0.7.2 -f https://download.pytorch.org/whl/torch_stable.html
2.4 安装字体
2.4.1 下载

2.4.2 安装设置


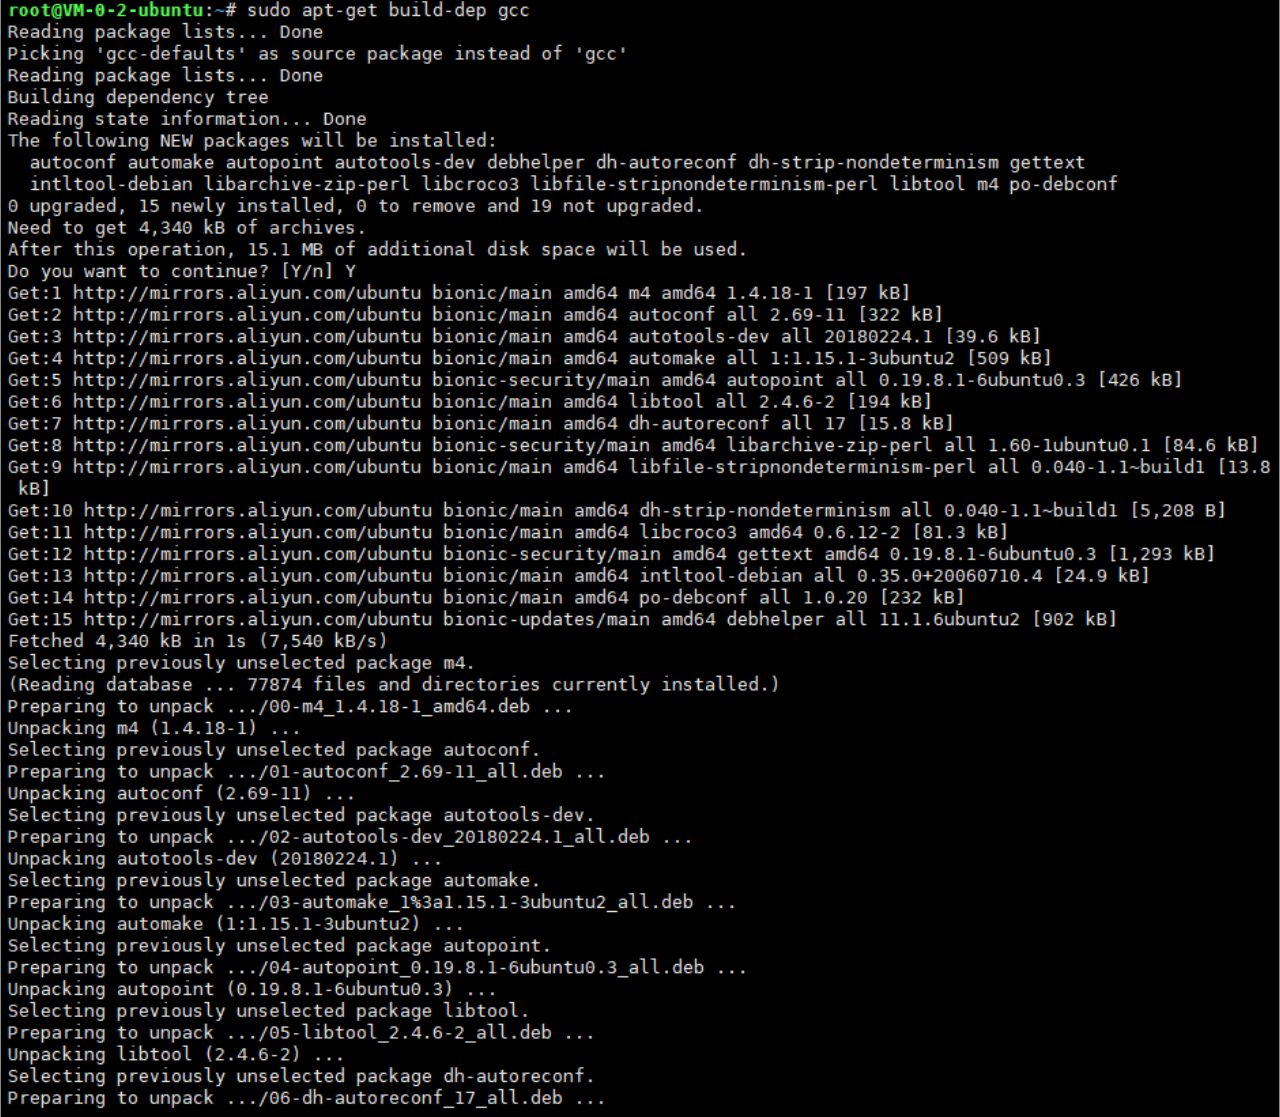
2.5 安装gcc
sudo apt-get build-dep gcc

3. 常见软件使用
3.1 vim
3.1.1 常用指令
:set number -------- 显示行数
3.1.2 替换字符串
n,$s/要替换的/替换之后的/g
n:表示从第n行开始
- g: 表示范围内行的每一个/要替换的/
eg.
:1,$s/source/target/g

3.1.3 复制n行
yy:			表示复制
nyy:		表示复制n行(从光标开始)
p:			表示粘贴
3.1.4 撤销操作
u # 撤销上一步操作
4. 文件操作
4.1 解压tar.gz
tar -xvf xxx.tar.gz

4.2 7z
apt install p7zip-full

7z x filename
5. 常用集合
5.1 换源
5.1.3 换源推荐
- aliyun
deb http://mirrors.aliyun.com/ubuntu/ bionic main restricted universe multiverse
deb http://mirrors.aliyun.com/ubuntu/ bionic-security main restricted universe multiverse
deb http://mirrors.aliyun.com/ubuntu/ bionic-updates main restricted universe multiverse
deb http://mirrors.aliyun.com/ubuntu/ bionic-proposed main restricted universe multiverse
deb http://mirrors.aliyun.com/ubuntu/ bionic-backports main restricted universe multiverse
deb-src http://mirrors.aliyun.com/ubuntu/ bionic main restricted universe multiverse
deb-src http://mirrors.aliyun.com/ubuntu/ bionic-security main restricted universe multiverse
deb-src http://mirrors.aliyun.com/ubuntu/ bionic-updates main restricted universe multiverse
deb-src http://mirrors.aliyun.com/ubuntu/ bionic-proposed main restricted universe multiverse
deb-src http://mirrors.aliyun.com/ubuntu/ bionic-backports main restricted universe multiverse
9. 建站手册
9.1 个人博客搭建
可以采用JavaWeb或者Python进行搭建网站.
9.1.1 JavaWeb 形式进行搭建
1)
2)
3)
4)
9.1.2 wordPress搭建
9.2 图床搭建
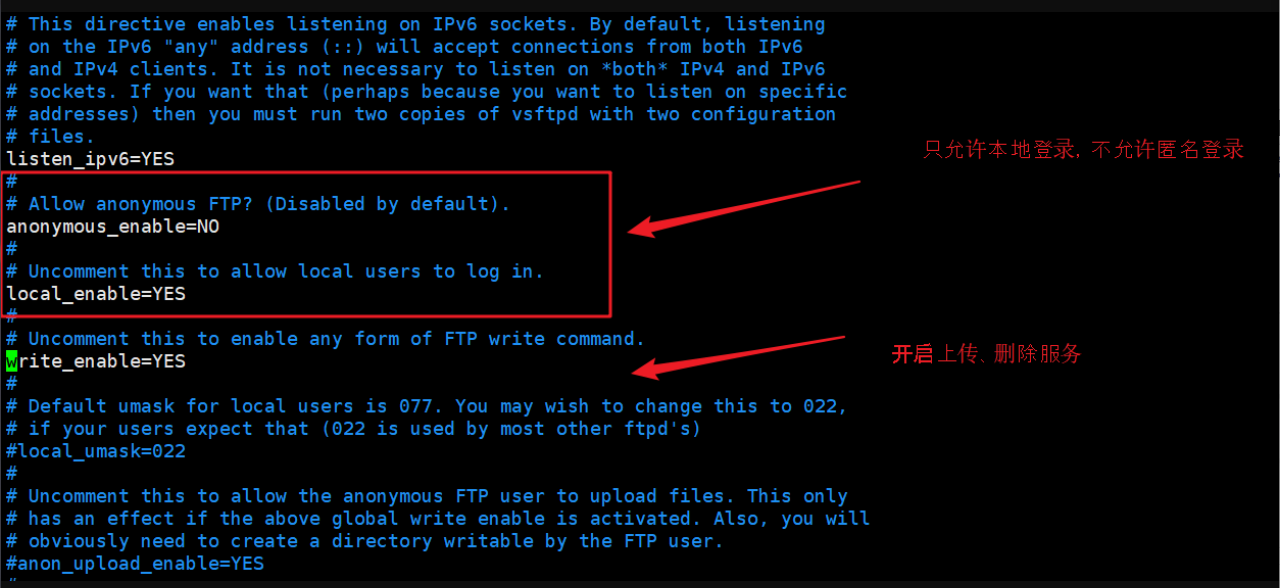
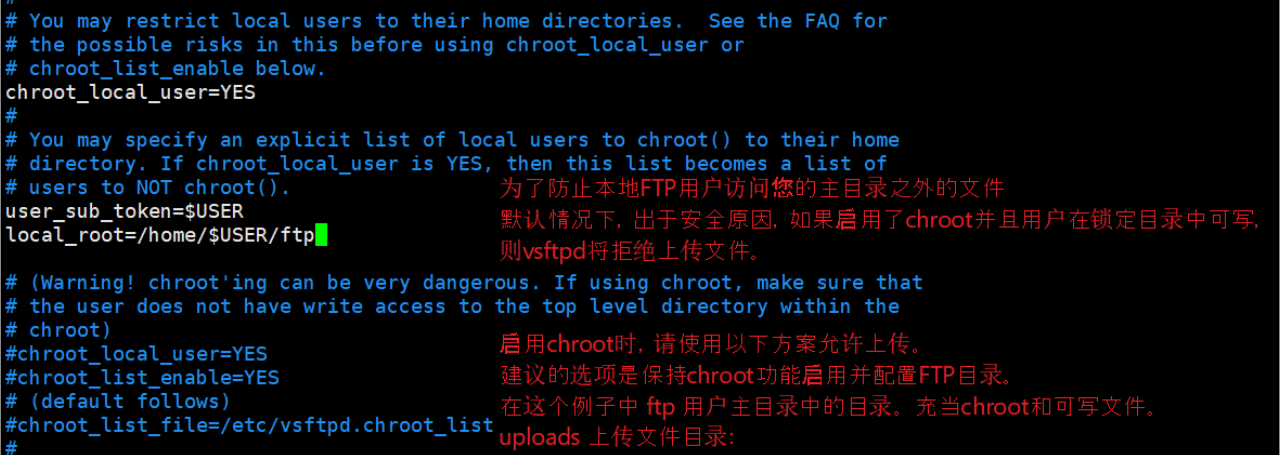
9.3 FTP 服务器搭建


9.4 vpn 服务器搭建
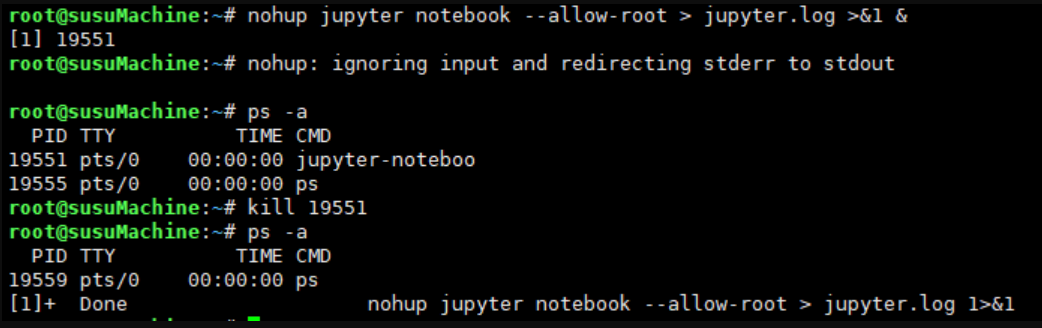
9.5 Jupyter NoteBook
9.6 搭建个人网站
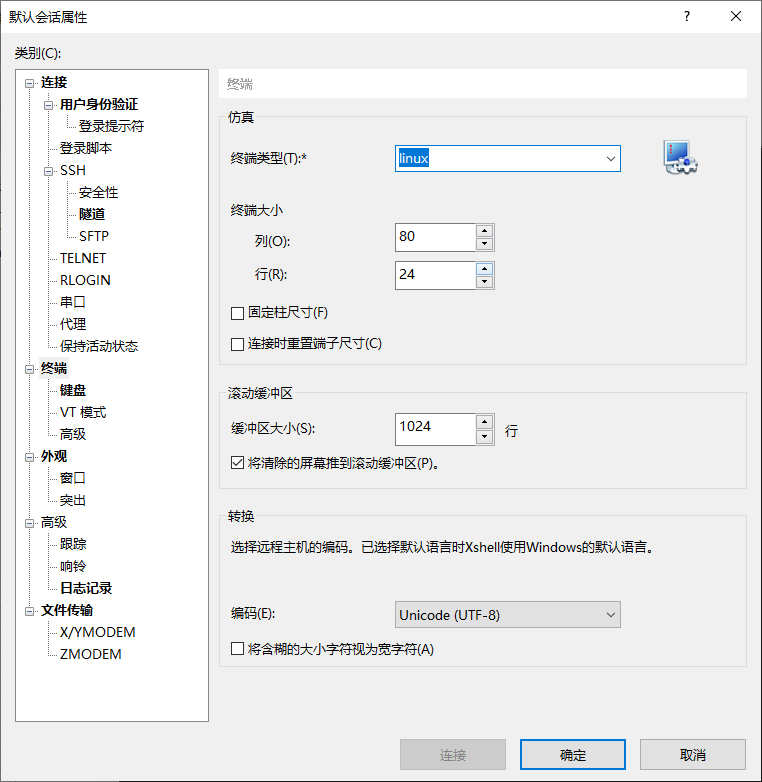
XShell 安装
链接:Baipan 提取码:orn1
9.6.1 Java环境
卸载openjdk
sudo apt-get remove openjdk*
下载jdk包,通过xfps发送至服务器,解压JDK并移动
sudo tar zxvf ./jdk-8u101-linux-x64.tar.gz
mv jdk*  /usr/java
输入vi ~./bashrc对bashrc进行修改
JAVA_HOME=/usr/java/jdk1.8.0_271
JRE_HOME=$JAVA_HOME/jre
JAVA_BIN=$JAVA_HOME/bin
CLASSPATH=.:$JAVA_HOME/lib/dt.jar:$JAVA_HOME/lib/tools.jar:$JRE_HOME/lib
PATH=$PATH:$JAVA_HOME/bin:$JRE_HOME/bin
export JAVA_HOME JRE_HOME PATH CLASSPATH
验证成功!

9.6.2 安装mysql
step 1
sudo apt update
sudo apt install mysql-server

step 2
sudo mysql_secure_installation


9.6.3 安装Tomcat
sudo groupadd tomcat
sudo useradd -s /bin/false -g tomcat -d /opt/tomcat tomcat
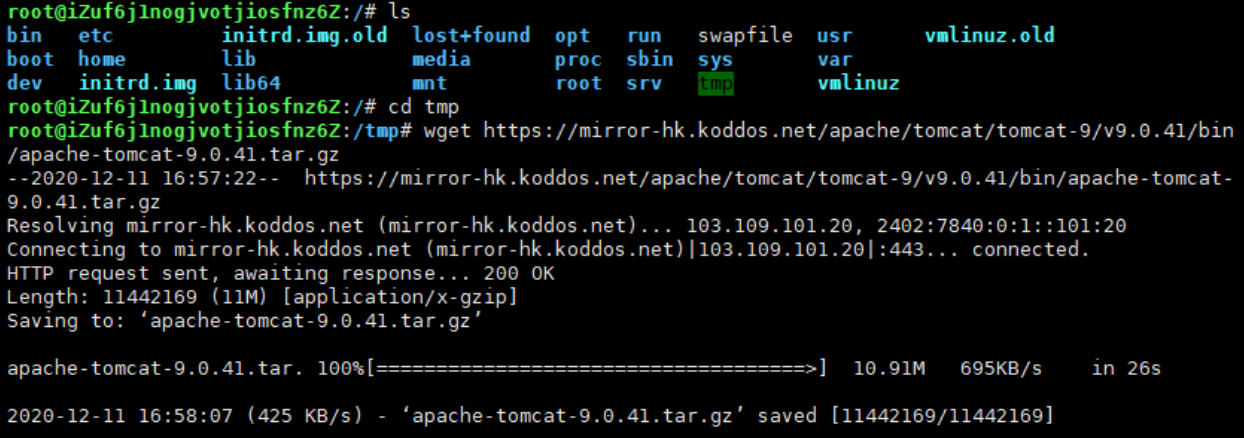
在网上找到tomcat的tar.gz文件进行下载:
cd tmp
wget https://mirror-hk.koddos.net/apache/tomcat/tomcat-9/v9.0.41/bin/apache-tomcat-9.0.41.tar.gz